Automating a Kiosk-Style Deployment of Ubuntu + VMware Workstation Pro
In large lab and nested-lab environments, being able to deploy a consistent reference machine — quickly, reliably, and with minimal manual intervention — can significantly streamline operations. That’s why I put together the ubuntu_kiosk_vmware_workstation_pro project: a bootable USB-flash drive solution based on Ubuntu that automatically installs VMware Workstation Pro (version 25H2 for Linux), extracts a pre-built VM image, and presents a kiosk-style desktop that boots directly into the VM.
The end goal: plug in the USB, install the OS, reboot, and you’re immediately at a desktop that auto-logs in and launches your VM — no interactive wizardry required.
Why this matters
Here are a few of the use-cases this addresses:
- Standardized workstations in training labs or demo rooms: all machines behave identically.
- Rapid redeployment of broken or repurposed machines: minimal setup time.
- Nested lab or proof-of-concept usage where you want a “desktop that just launches the VM” experience.
- Non-technical staff can perform re-builds without needing deep OS knowledge.
- Re-purpose older hardware, reuse of prior older MS OS licenses to dedicated VMware images. Don't throw them away.
How it works — architecture overview
At a high level, the workflow is:
- Boot from the custom USB flash drive (Ubuntu desktop image modified).
- The auto-installer lays down Ubuntu OS to target HDD/SSD, including offline installation of necessary
.debpackages if network might not be present. - A first reboot happens into the newly installed OS; during this stage the script installs VMware Workstation Pro, extracts the compressed VM image, adds desktop links, and prompts final reboot.
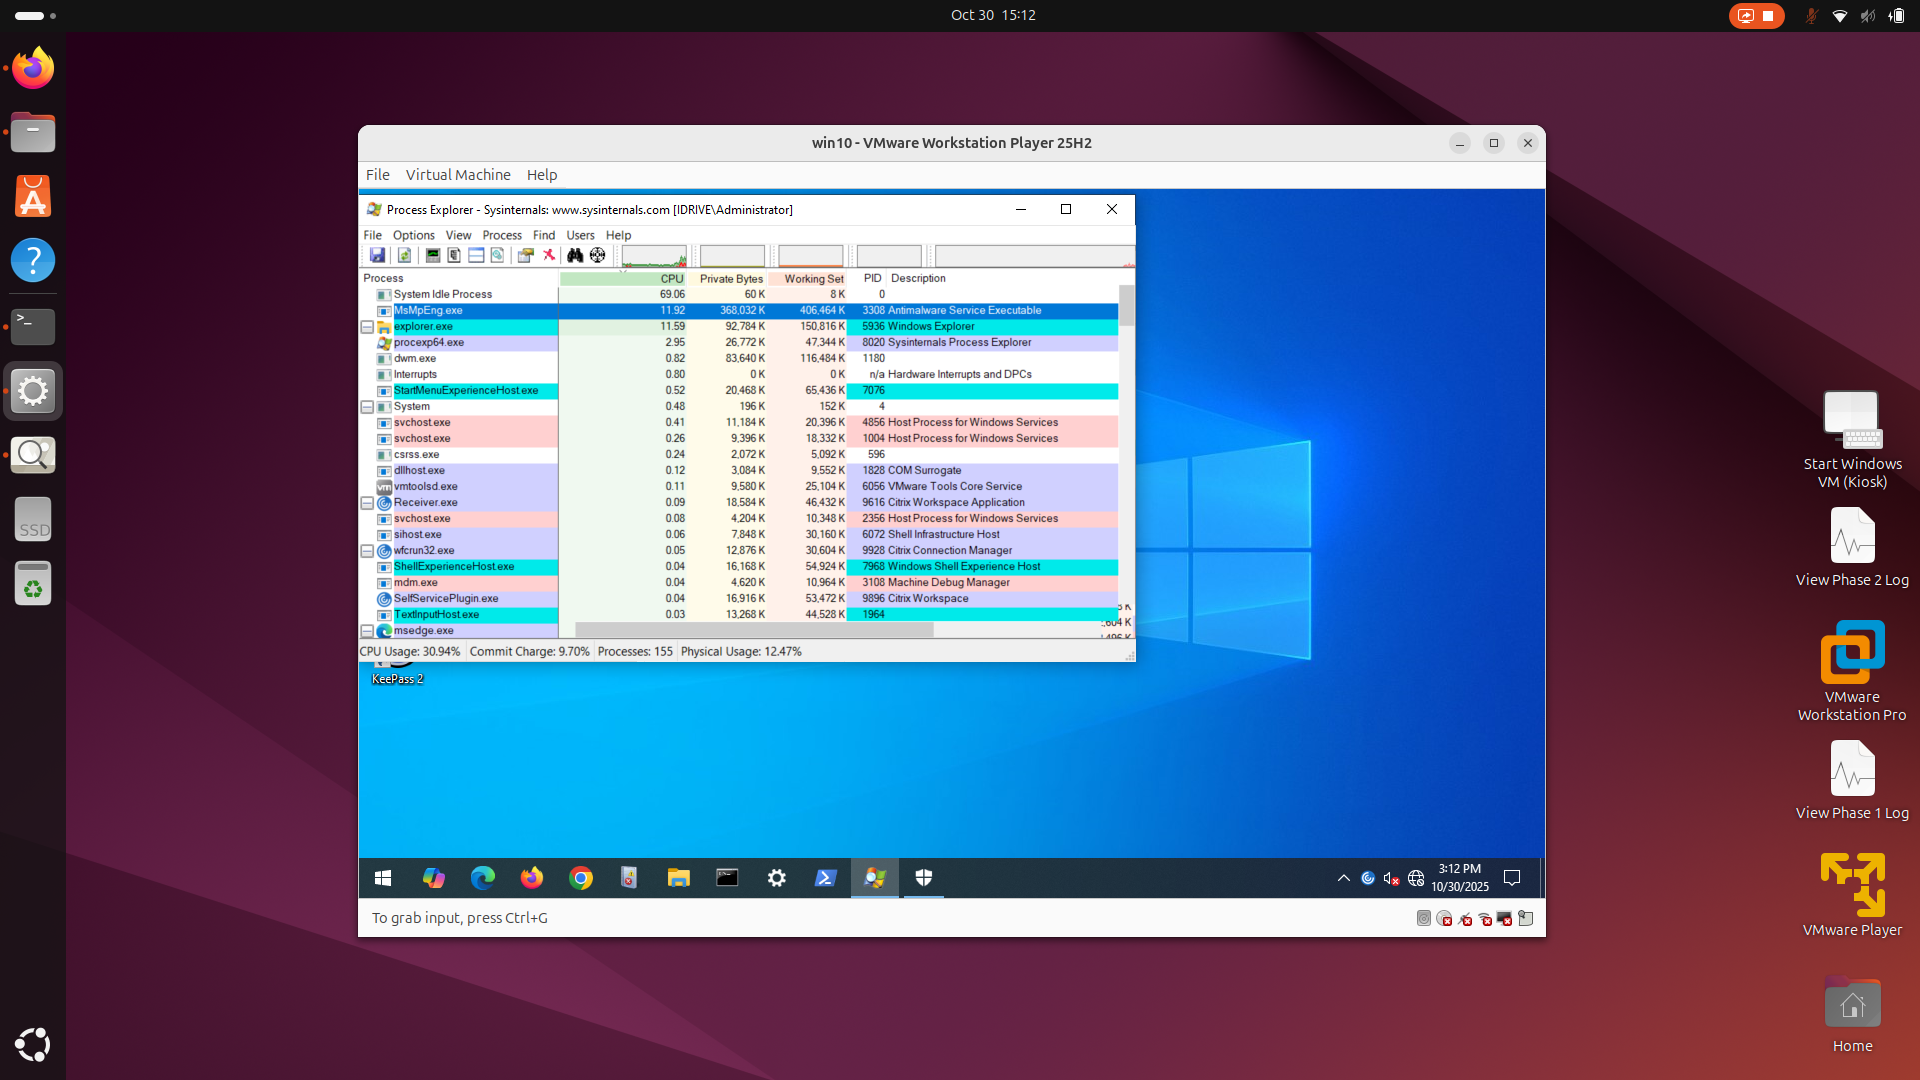
- On the second boot, the system auto-logs into a user session, launches the extracted VM via VMware Workstation Pro, and the user is immediately in the VM desktop — no login prompt.
Overall durations are: 10–15 min for OS install + offline package install, 10–30 min for first reboot + Workstation install + VM extraction, then 2–5 min after second reboot for auto-login and auto-VM launch. GitHub Included as well are architecture diagrams and process flow images inside the repo.
Key components
Here are some of the major building blocks:
- Custom Ubuntu ISO: Based on Ubuntu Desktop, but edited to include preseed/cloud-init style scripts (user-data/meta-data) so the OS can install with minimal input. GitHub
postinstall.sh&postinstall2.sh: One runs in thechrootenvironment to set base configuration, the other runs in the user context to set up auto-login, desktop links, Workstation shortcuts. GitHub- Offline
.debpackages folder: To allow installation even if the workstation has no network connectivity. GitHub - VM image compressed and split into 4GB chunks (to accommodate FAT32 compatibility on the USB). GitHub
- Bootloader modifications (
grub.cfg,loopback.cfg) pointing to/autoinstallerfolder where meta-data and user-data live. GitHub -
user-datamust be in YAML format and begin with#cloud-configand use spaces, not tabs. - Ensure all modified files are UTF-8 and Unix LF end-of-line encoding.
Deployment steps (summary)
Here’s a condensed version of the steps to use this project:
- Download the Ubuntu Desktop ISO (from Ubuntu.com). GitHub
- Download the Linux VMware Workstation Pro binary (from Broadcom support site). GitHub
- Use an ISO editor (e.g., UltraISO, WinISO) to inject the custom folder structure and files (bootloader configs,
/autoinstallerdirectory). GitHub - Burn or write the resultant modified ISO to a USB flash drive (e.g., using Rufus if on Windows). GitHub
- Copy any custom configuration or installation files to /media folder, e.g. VMware Workstation Pro, offline deb files, VMware Image.
- Boot the target workstation from the USB drive and allow the automated installer to run through its process.
- After reboot, verify the VM launches and auto-login is working.
Tips & considerations
– Ensure the target hardware supports booting from USB and that you’ve configured BIOS/UEFI accordingly.
– If network connectivity is limited, ensure all necessary .deb packages and VM image files are included offline.
– Monitor the storage size on the USB: large VM images and split 4GB chunks will require sufficient capacity.
– The auto-login and VM launch assume the user session will be dedicated to running that VM — this may not suit environments where the desktop is shared for other tasks.
– If you plan to update the VM image (or VMware Workstation version), you’ll will only need to update the /media folder. There is no expectations to have to rebuild the USB image completely.
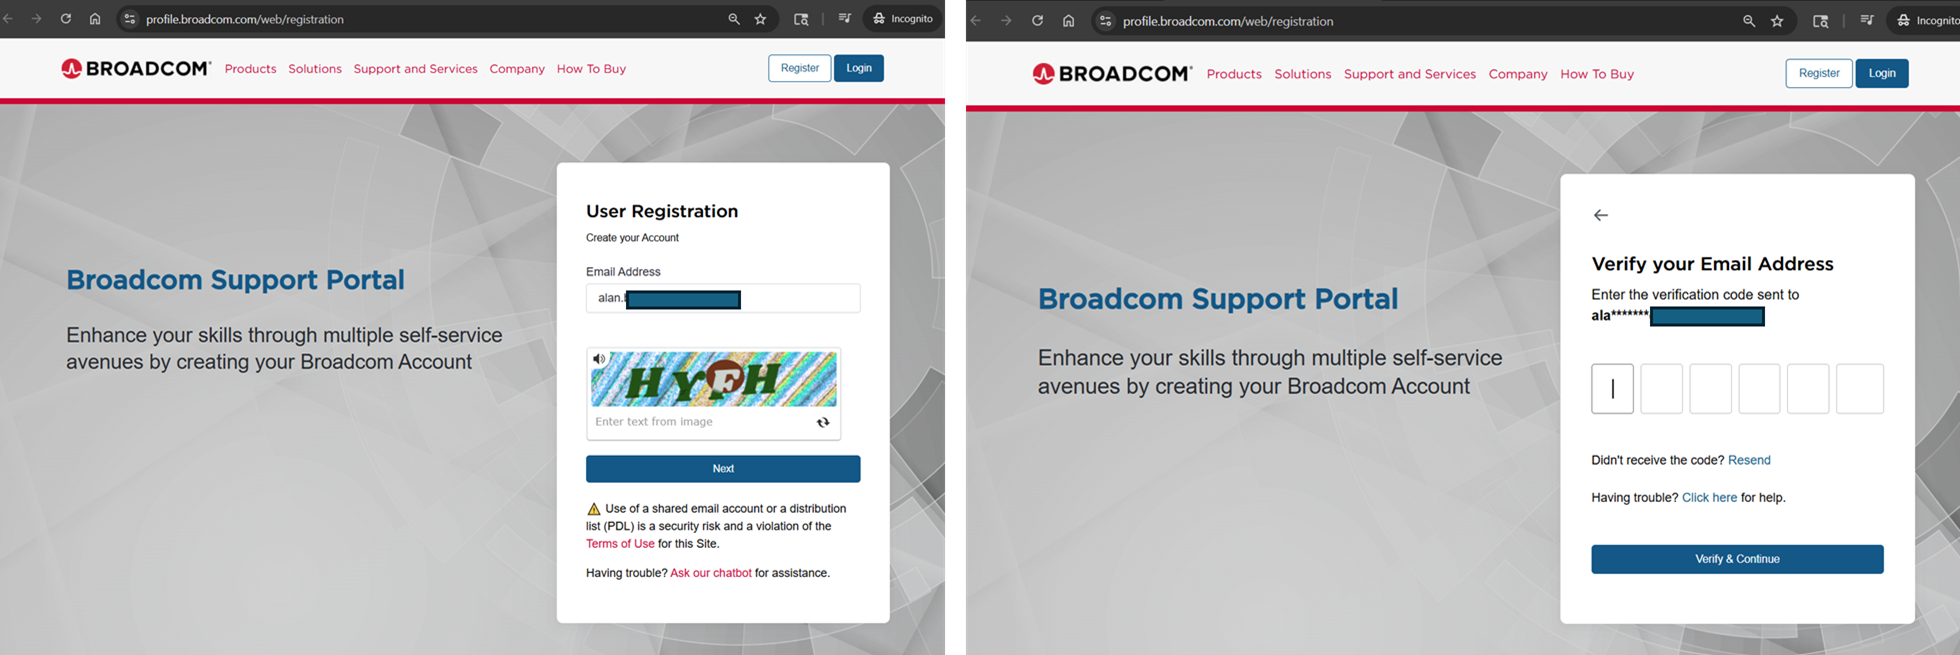
VMware Workstation Pro
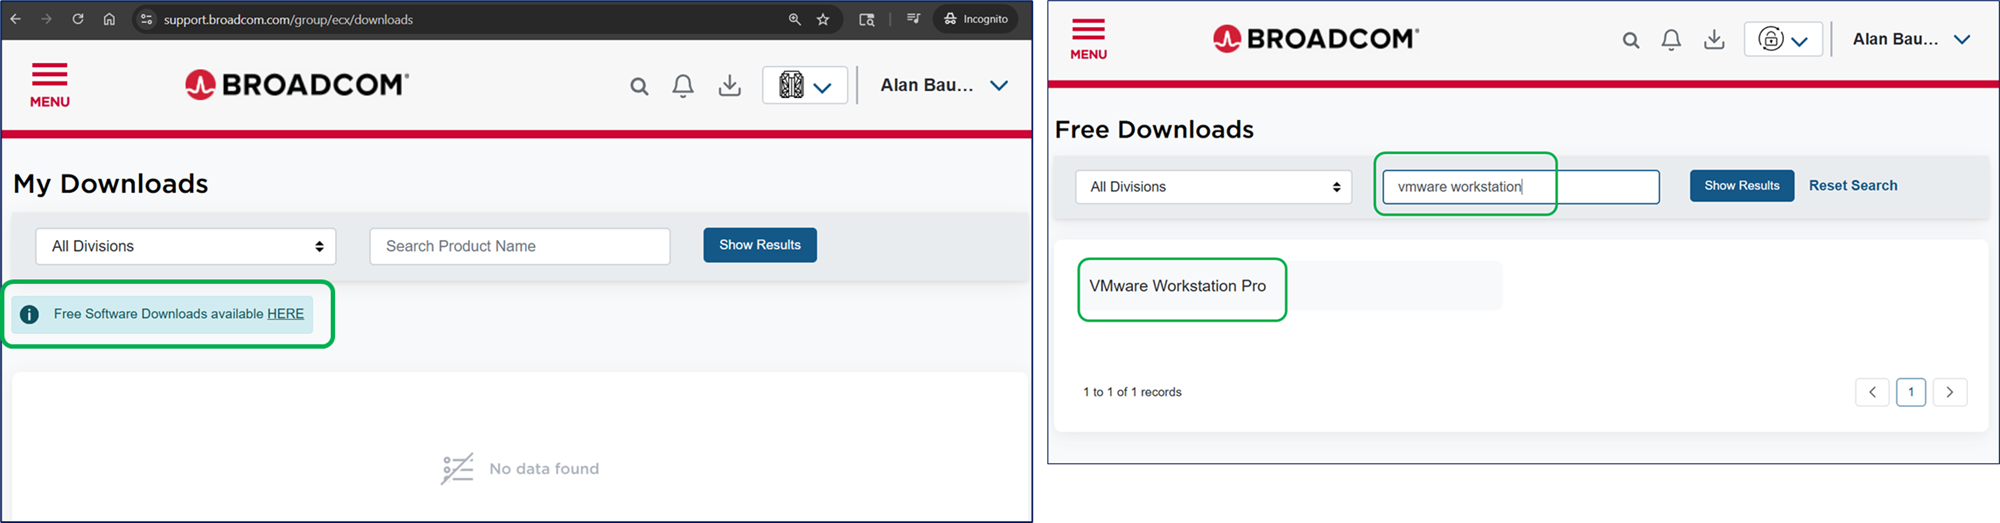
Download the latest Linux VMware Workstation Pro binary for Linux from Broadcom Support Site under Free Software Downloads. Note: Site requires registration for login and to download files. [as of 11/25] https://profile.broadcom.com/web/registration
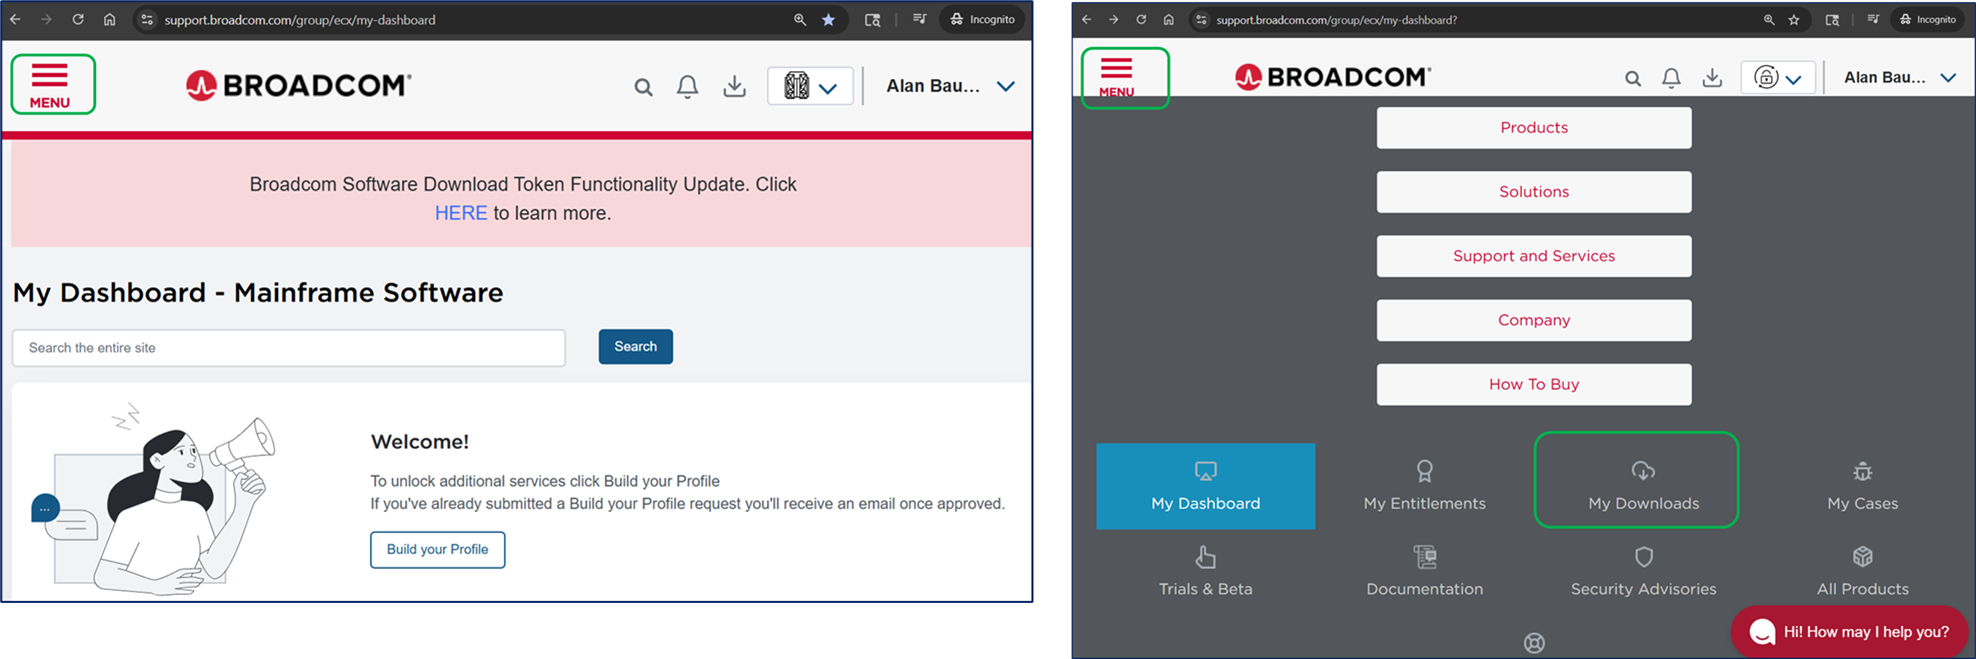
After login, you will have a generic dashboard. Select the upper left "hamburger" menu, then select "My Downloads" icon.
Please select the "Free Software Downloads" section. The in the search edit box, type "vmware workstation"
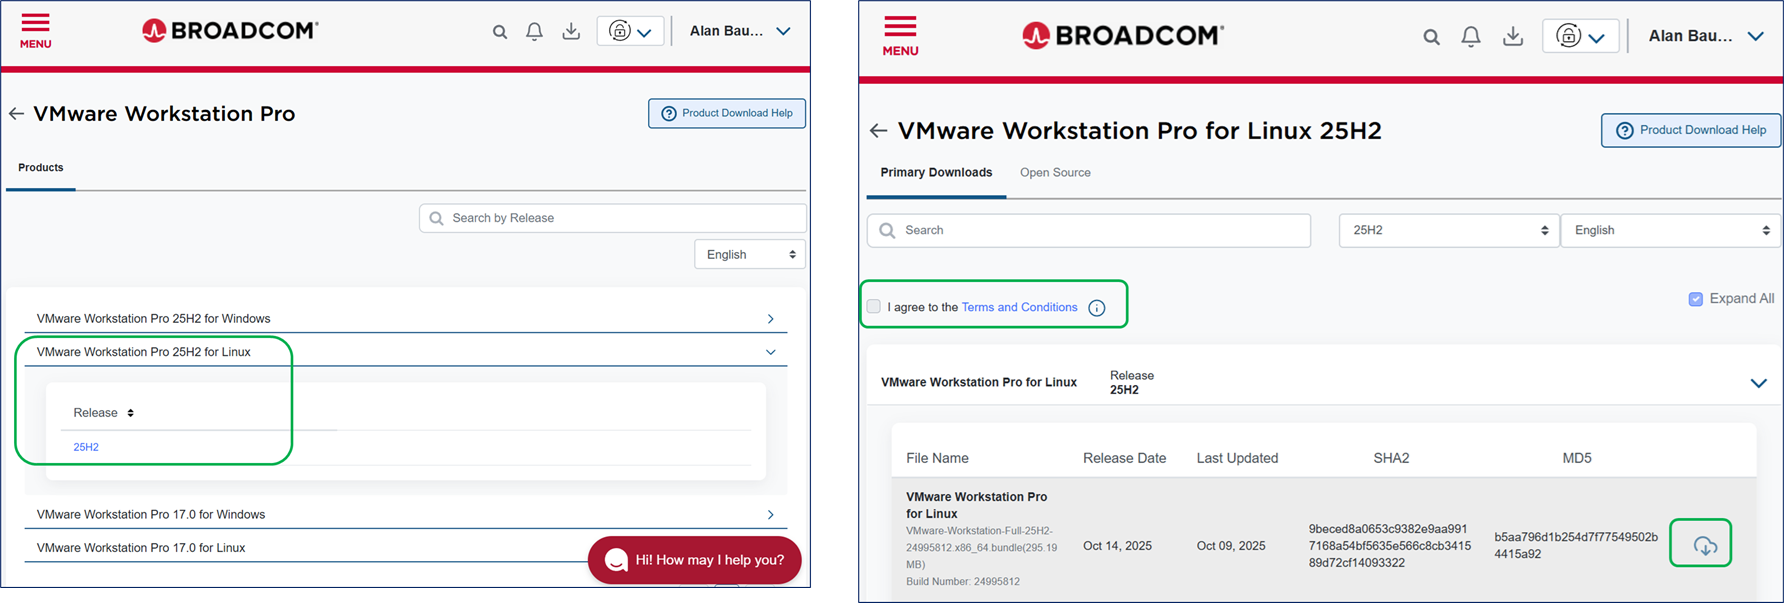
Select the version of VMware Workstation Pro for Linux. Click the hyperlink/checkbox to access "Term & Conditions", then click the download icon.
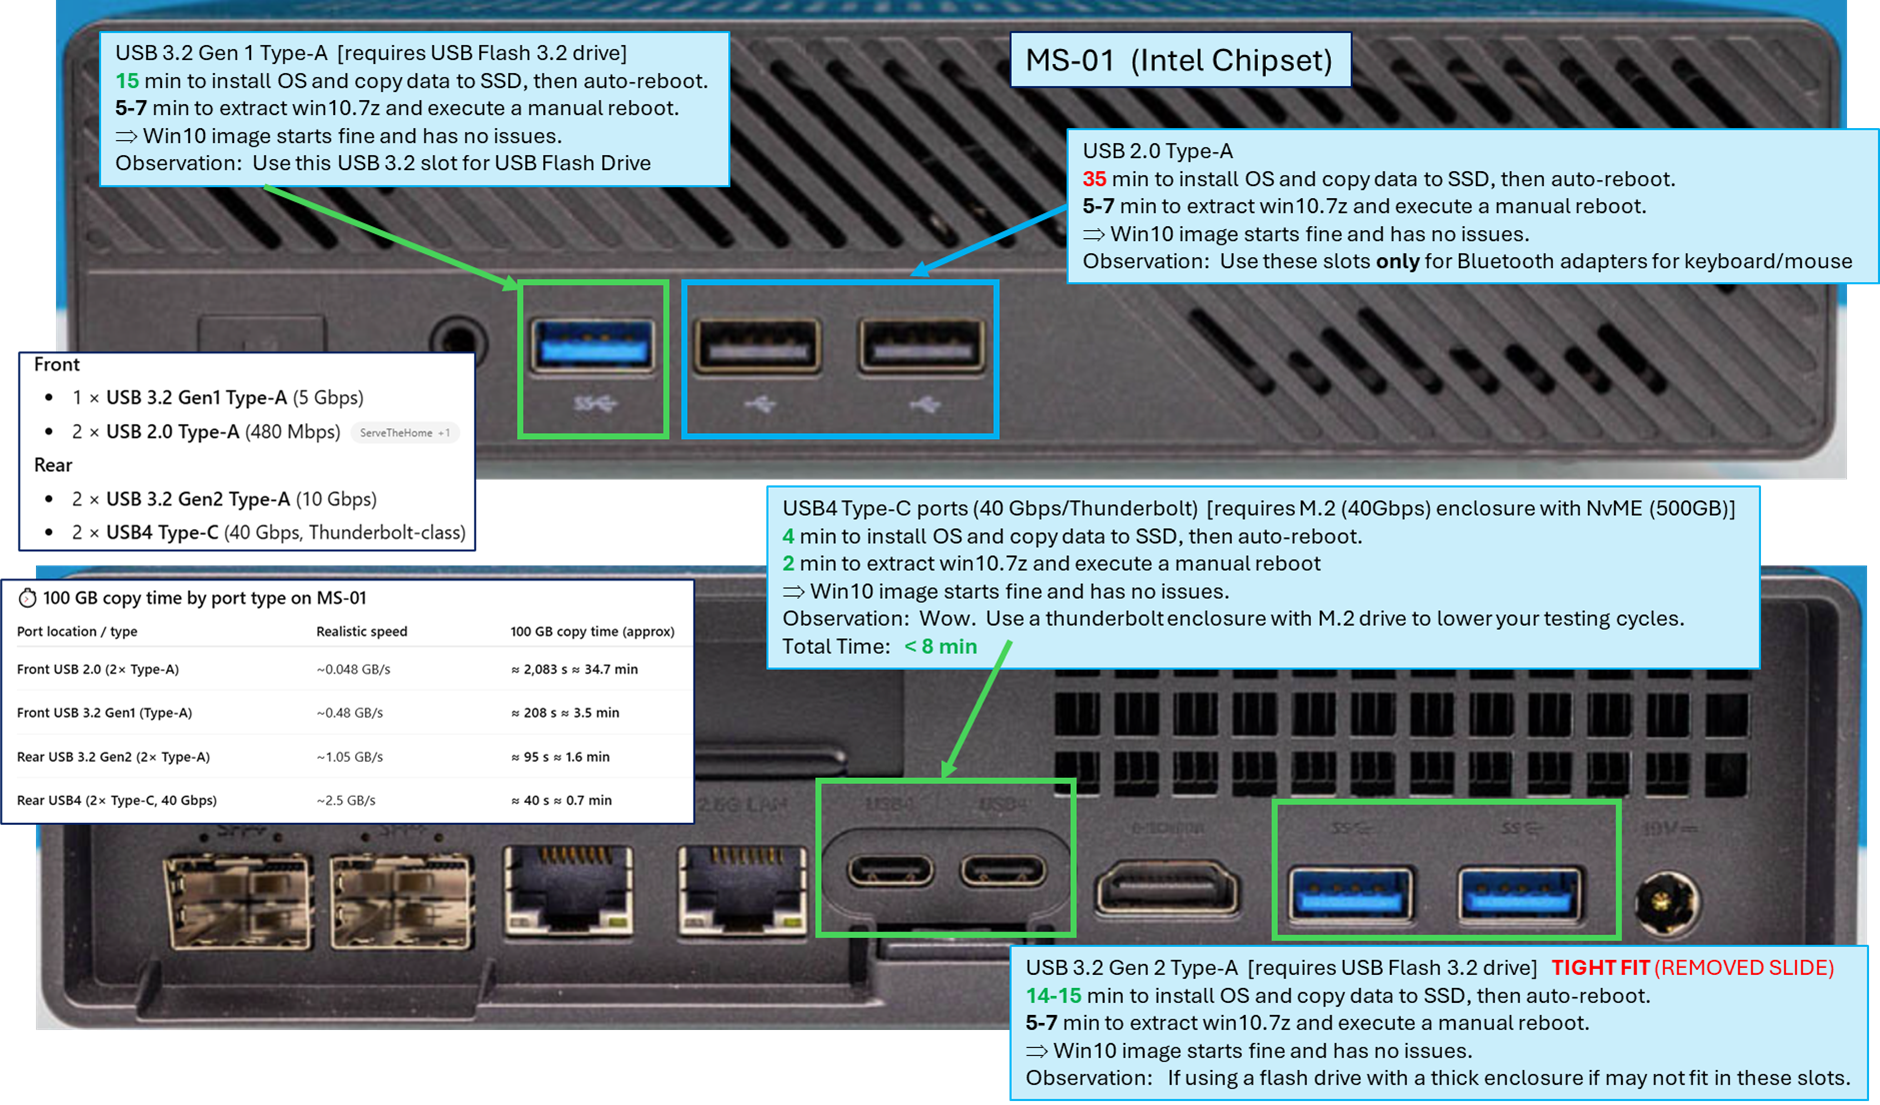
USB Recommendations:
Minimally use a USB 3.2 Flash Drive. If your laptop or older device supports thunderbolt (USB-C), look at using an M.2 drive with the Thunderbolt enclosure. The speed difference will amaze you. Even if you use this Thunderbolt enclosure with the USB 3.2 type A connectors, it will still be very fast.